Wednesday, July 22, 2015

Ice Cream Amara


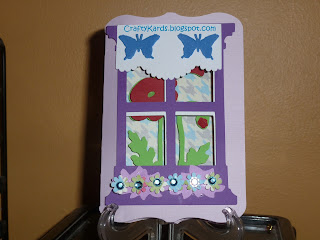
 Hello Every One! I just Love using Paper Nest Dolls in my creations! My latest creation was for my son's Pre-School Teacher, Mrs. Stephanie. I used my new favorite Cricut Cartridge called Creative Cards, for the base, which is 5 inches. I added the other layers of flowers and my own butterflies using my Martha Stewart Butterfly punch and stamp.


This is the inside of the card where you see the sentiment and Ice Cream Amara! I cut the first layer
4 3/4 inches and the second one 3 inches.


Here is a close up of the sentiment, I used Our Daily Bread Stamps, I love them!


Ahh... the Beautiful Ice Creme Amara! I used my Copics to color her. E37, B05, B24, R14, R39, and 100.

I also made a 8x8 size box with my Martha Stewart Score Board to hold the card. The butterfly is from Home Accents Solutions cart and the boarder is made with another one of my MS punches.

Thanks for stopping by and seeing my creations!
I love comments and new followers!
Blessings, Eileen Fields

Sunday, July 5, 2015

A Happy Little Spot on Cloud 9

Hello Everyone! I'm very happy to present my first entry as Guest Designer for the Paper Nest Dolls Challenge blog! I used a sketch number 397 from Mojo Monday.


This is the card base at 6 inches
Here I added a layer of Bow Bunny Cardstock. It is 5" x 3/4" inches.
I added two banners at 2" inches, plus a 3 inch circle and Island Girl Amara.
I completed my creation with stamp from American Crafts Noteworthy set.

Saturday, September 27, 2014

My Cricut Craft Room's School Days Blog Hop

https://blogger.googleusercontent.com/img/b/R29vZ2xl/AVvXsEi8wATnqb0hqgWx2aU2Iadt3Wrv6MLPZMyLz5hGtq3B-IZTrKVj8BrWHBuqySu51Gt5xupIHQlMEb5pcfvoV0NRz_oako66aDG_mCM7RTqZCZFKNfbn4uQaOaHfZTp7TEutHOJRcGEjKrM/s1600/School+Days+Hop.png

Welcome to My Cricut Craft Room's School Days Blog Hop.......
  
I made this Scrapbook Layout at my son's school's Back to School Crafting Day! I couldn't Wait for this day to come! It was so much fun! I used DCVW Spring Paper Pack for the background and letters.  The rest of the cuts are from Recess Cricut cartridge most are cut at 2' -3'. Happy Saturday!
Thanks again for stopping by!

Start 
6.  Craft Lovers Come Here http:craftloverscomehere.blogspot.com
7.  Me 

Saturday, June 7, 2014

Thanks for joining us for My Cricut Craft Room's June Dad's and Grads Blog Hop! You should've come from Trish, if you just happened to stop by my blog, please go back to Trish, http://ifieverdoit.blogspot.com. Today, I showing a scrapbooking layout I made last year with a family, fishing and Father's Day theme. It's very verstile! My husband and daughter's go out fishing a lot, so I decided to celebrate their time together.


These close ups really show the meaning of family and the importance of a realationship between father's and daugher's! I don't go with them, I'd rather be crafting. Lol! My daughter Mariea's trying to get me to go with them, I may surprise her one day! Thanks, for stopping by, your next stop is: http://craftingblogevents.blogspot.com

Here's the line up:
1. Start-http://mycricutcraftroom.blogspot.com
2. Amanda -http://salnclts76.blogspot.com
3. Vicki - http://vickiscraftroom.blogspot.com
4. Connie - http://papercraftingfromanotherviewpoint.blogspot.com
5. Erica -
6. ShanAnn- http://kraftinmama.blogspot.com
7. Trish - http://ifieverdoit.blogspot.com
8. You Are Here! http://craftykards.blogspot.com
9. Crafting Blog Events - http://craftingblogevents.blogspot.com

Thanks again for hopping with us today!


Saturday, May 10, 2014

Mother's Day Blog Hop with My Cricut Craft Room


 Thanks for joining us for My Cricut Craft Room's May Blog Hop! Today I made a Tri-Fold Shutter Mother's Day Card using Forever Young Cricut Cartridge, Hot Off The Press Clear Lady Stamps, Martha Stewart Score Board and Recollections Bling. The Base of the card is 12 x 5 1/2, make score lines at 2", 4", 8" and 10". Place card on board vertically and score at 1 1/2" turn on the other side and repeat.


Thanks for stopping by Next you will go to Crafting Blog Events
Here's the whole line up:
1.http://mycricutcraftroom.blogspot.com
2. http:creationsbymommy.blogspot.com
3. http:salnclts76.blogspot.com
4.http://vickiscraftroom.blogspot.com
5. https://CraftLoversComeHere.blogspot.com
6. You Are Here www.craftykards.blogspot.com
7. Next http://craftingblogevents.blogspot.com

Again, thanks so very much for hopping with us today!


Sunday, May 4, 2014

My First Day Working at Michaels in Troy Mi!


WOW! I'm a Crafting Instructor At Michaels!! I started May 3, 2014!

Saturday, March 15, 2014

Birthday Blog Hop

Thank You for joining us on My Cricut Craft Room's Birthday Blog Hop! You should have started at Robin's blog. If you just stumbled on my blog, please go back to http://MorphManiaCreations.blogspot.comRobin. Today I made a Tri-Fold Shutter Birthday Card for a close friend of mine. This card was a challenge for me because of all the measurements! I got the hang of it, after a while.
Here's a picture of it laying flat so you can get the full effect of the sections. I left on square blank so I could write a sentiment.
Now, it's upright so you can see the unique design of the card.
Here's a close up of the model I cut from Forever Young Cricut Cartridge. It's model 14 and size is 5 inches, the dress form on the right side is the same size. Supplies needed:
  • One 5 1/2" x 12' piece of Cardstock
  • Martha Stewart Score Board (or other scoring tool)
  • Paper Cutter
  • Patterned Paper (your choice)
  • Bone Folder
  • Craft Knife
  • Ruler
  • Adhesive
Step by Step instructions
Step 1) Place 5 1/2" x 12 piece of cardtock horizontally on your score board.
Step 2) Turn cardstock a 1/4 turn. Along the top edge, measure in 1 1/2".) Make a slit with a craft knife or paper cutter between the score marks at 2" and 10". Repeat on the other long side.
Step 3) Fold card go to www.splitcoaststampers.com for further instructions. When, you get to the site, click on resources, then tutorials followed by trishuttercard.
4. Cut 4 pieces of paper 1-3/8" x 1 7/8". Cut 2 pieces of paper 1 3/8" x 3 7/8". Cut 1 piece of paper 2 3/8" x 3 7/8". Place all cuts on the base to make sure they fit properly and adhere. Decorate and embellish. The crafter who made this tutorial is Bonnie Szwalkiewicz.
I used Recollections cardstock, buttons from Walmart, Cardz TV "Sew Much Fun" Clear Stamps and adhesive tape runner by Bazzill. Hero Arts Clear Stamp Set (high heeled shoe) and Sparkle N Sprinkle Set 392 (for the Happy Birthday Stamp).

Next you will go to Trish's Blog

Here's The entire line-up in case you get lost along the way,

Erica http://mycricutcraftroom.blogspot.com
Me  http://craftykards.blogspot.com
You are Here
Next
Shana  http://craftingblogevents.blogspot.com 
Vivi J http://vivijdesigns.blogspot.com
Julie http://cricutchirp.blogspot.com
ShanAnn http://kraftinmama.blogspot.com
Vicki www.vickiscraftroom.blogspot.com
Erica http://ericasprojects.blogspot.com
Robin http://MorphManiaCreations.blogspot.com
Eileen http://craftykards.blogspot.com
Trish http://ifieverdoit.blogspot.com
Patty http://Pattyscreations.blogspot.com
Connie http://papercraftingfromanotherviewpoint.blogspot.com
Craft Lovers Come Here http://CraftLoversComeHere.blogspot.com

Thanks for hopping along The Birthday Blog Hop! Please leave me a comment and become a follower before you go on to see Trisha's project. Have a great weekend!


Thanks for stopping by, please leave a comment and follow me!